Installing the Display
Caution: Due to its weight, installing the Display requires at least two persons.
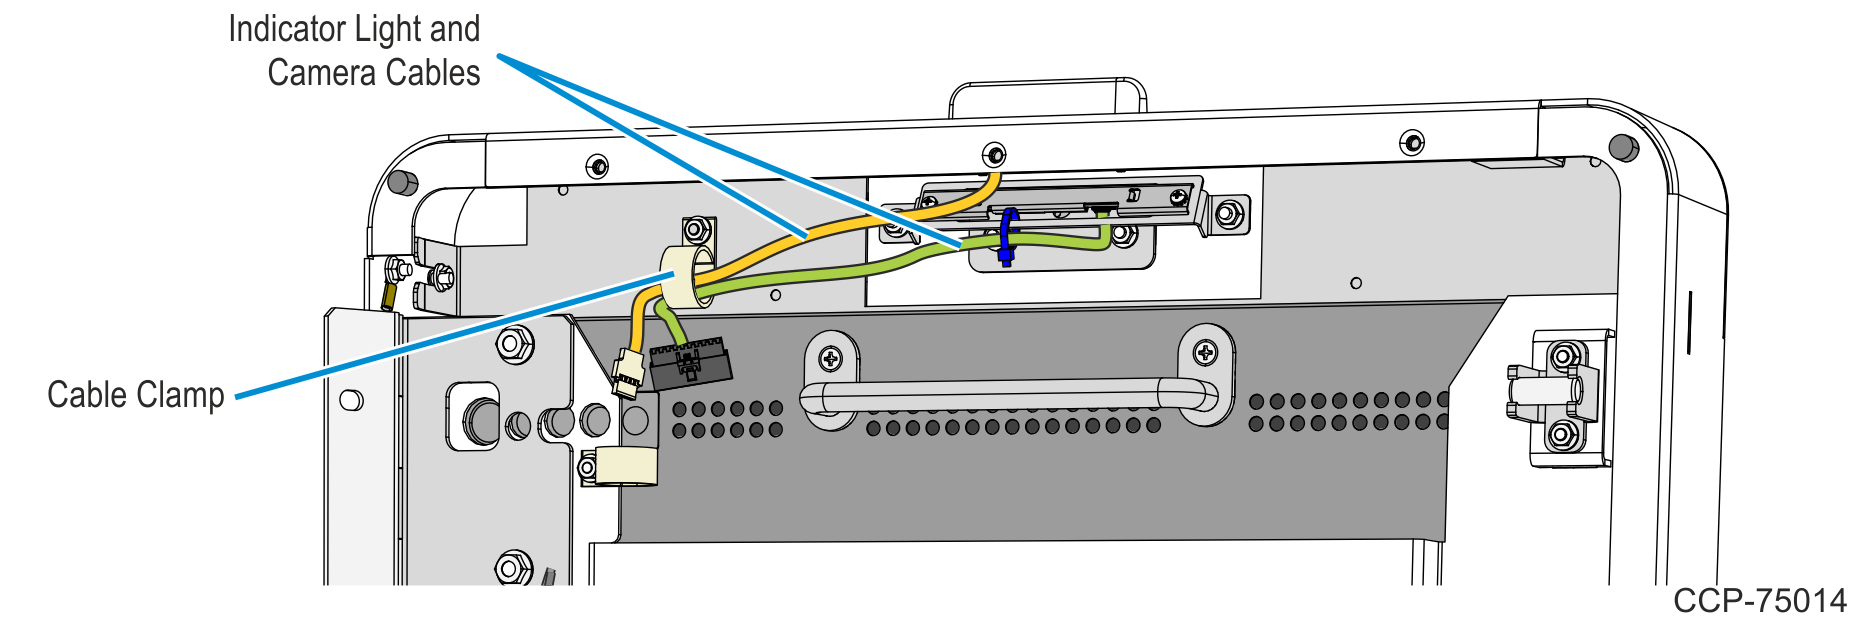
1.Remove the Indicator Light and Camera cables from the cable clamp securing it to the Door Top Panel.
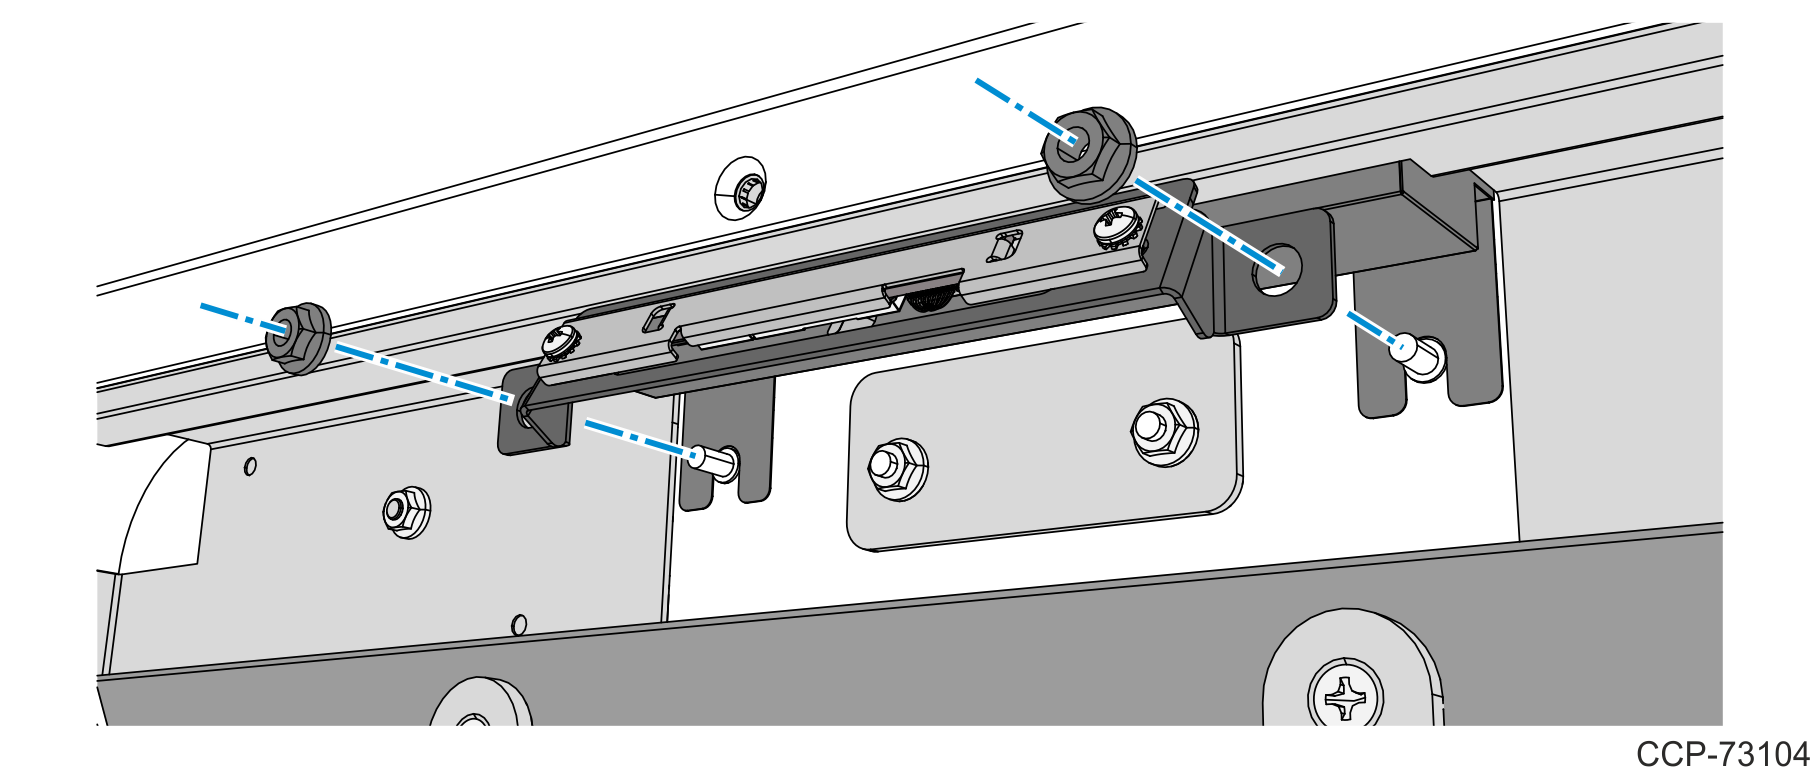
2.Remove the Camera assembly from the kiosk by removing two M4 nuts.
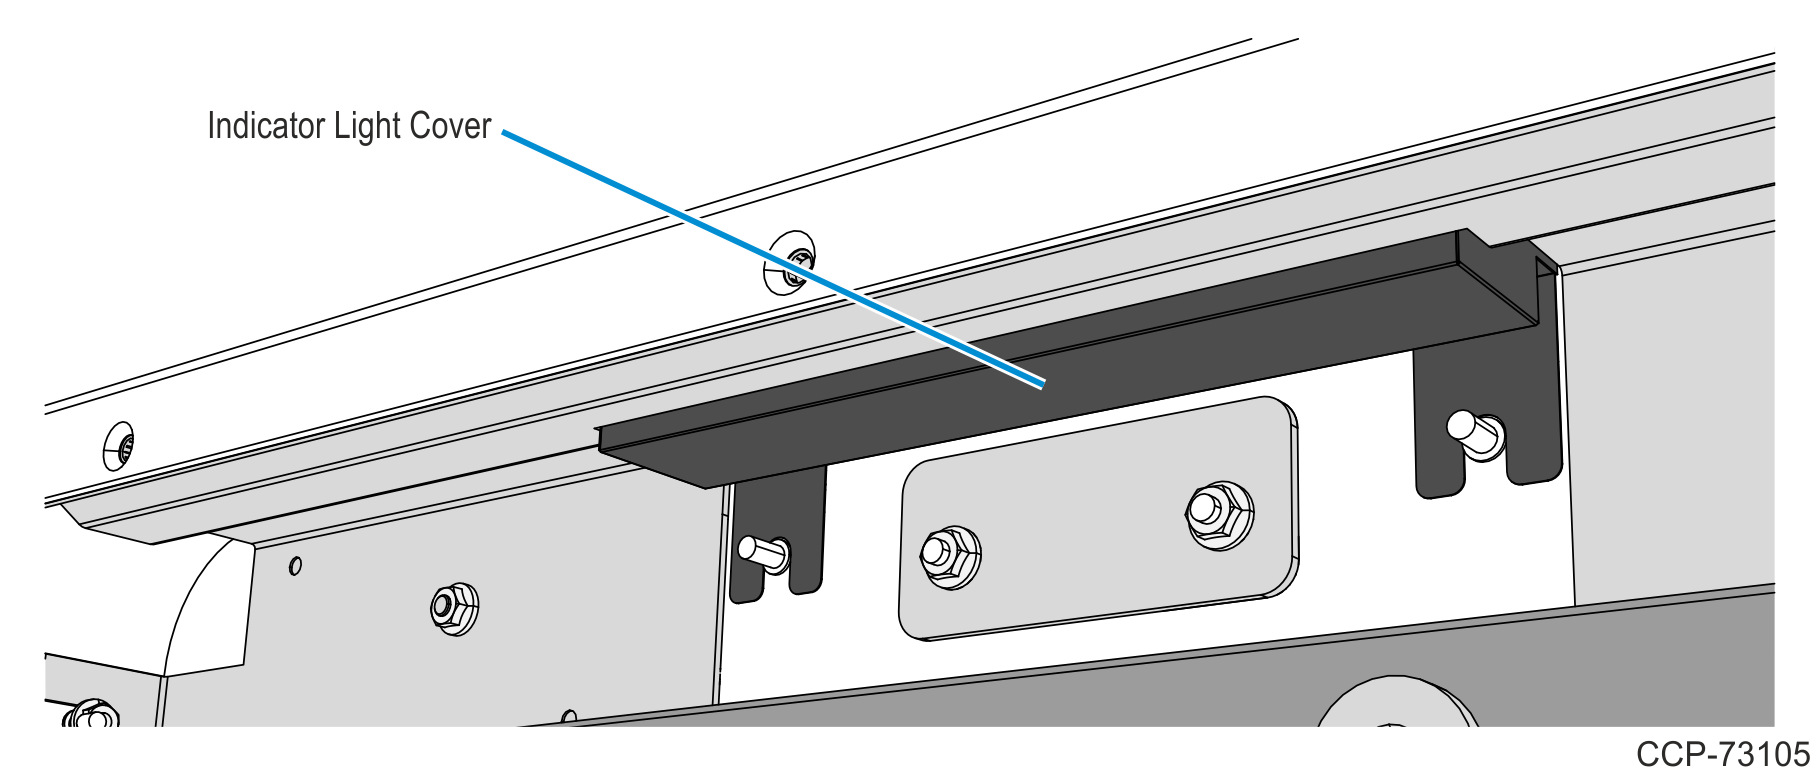
3.Remove the black plastic Indicator Light Cover from the Top Panel.
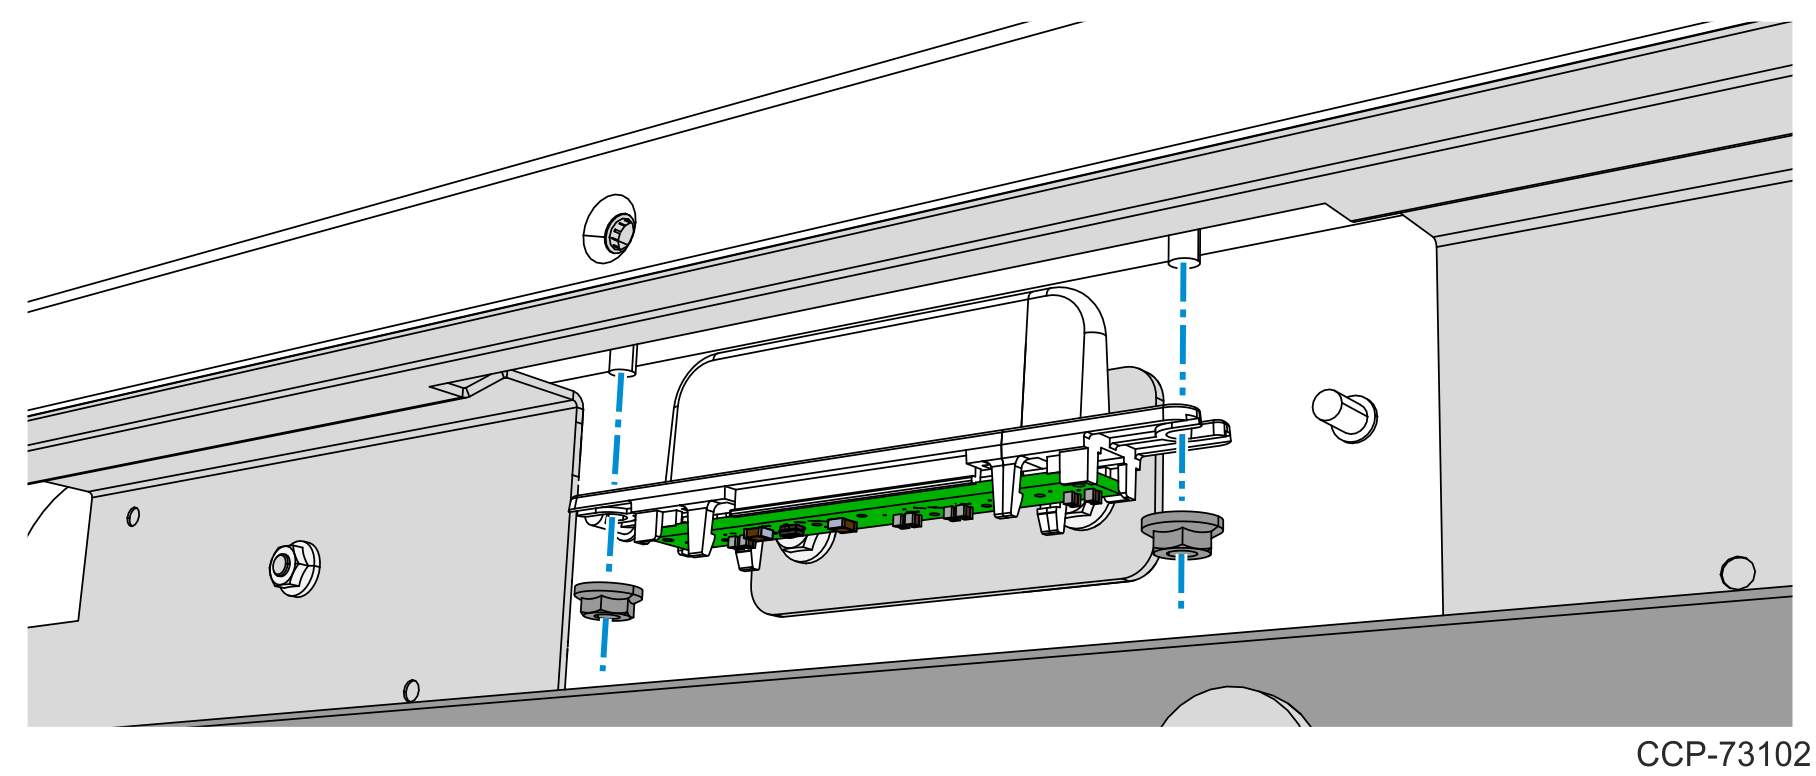
4.Remove the Indicator Light assembly from the kiosk by removing two M4 nuts.
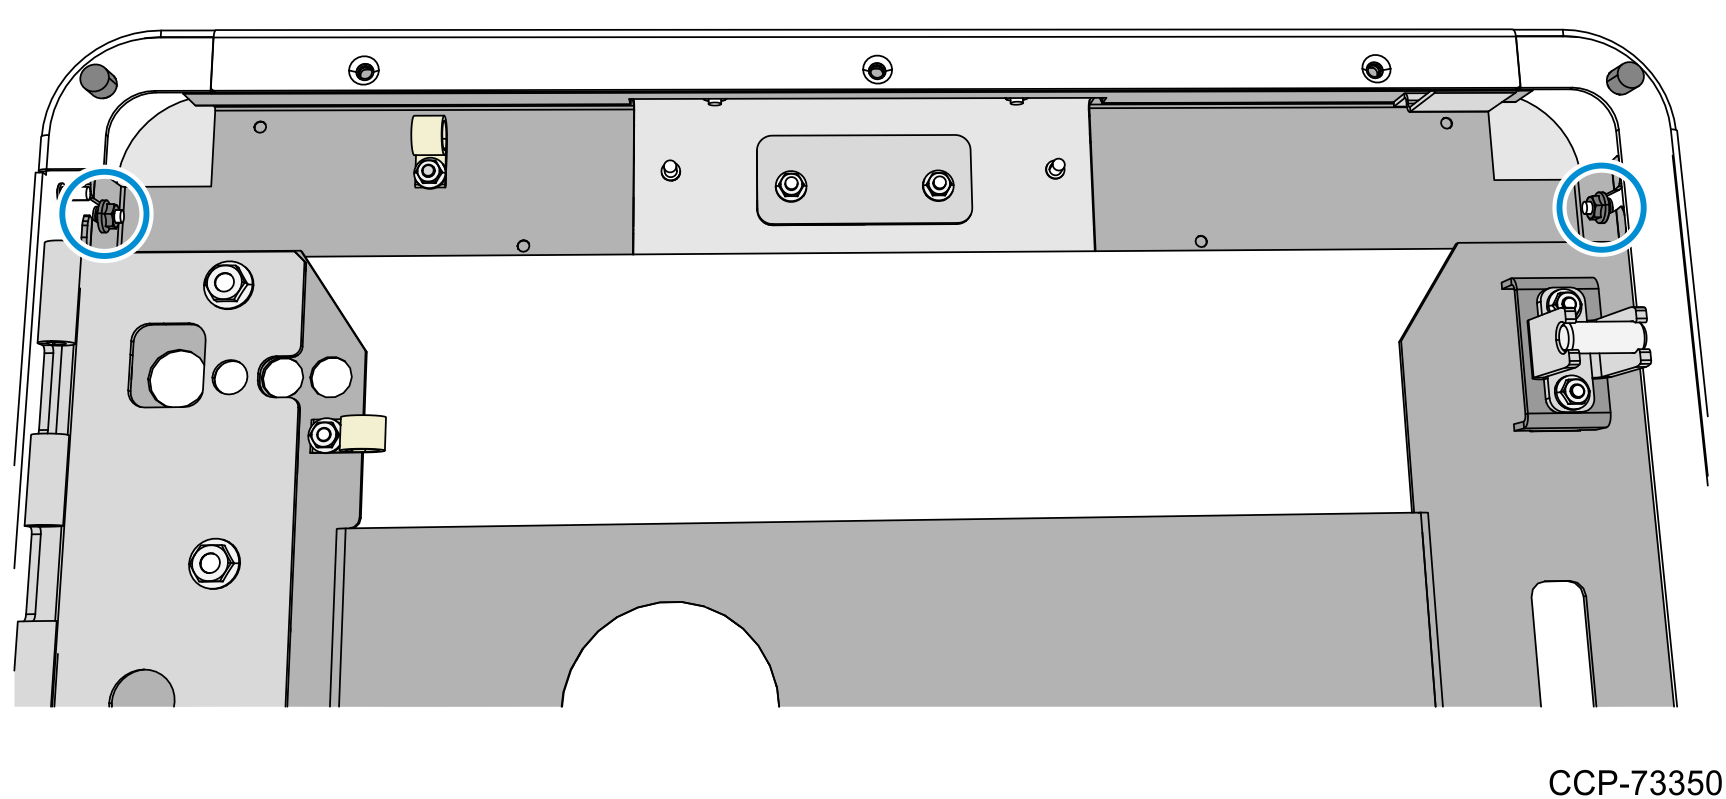
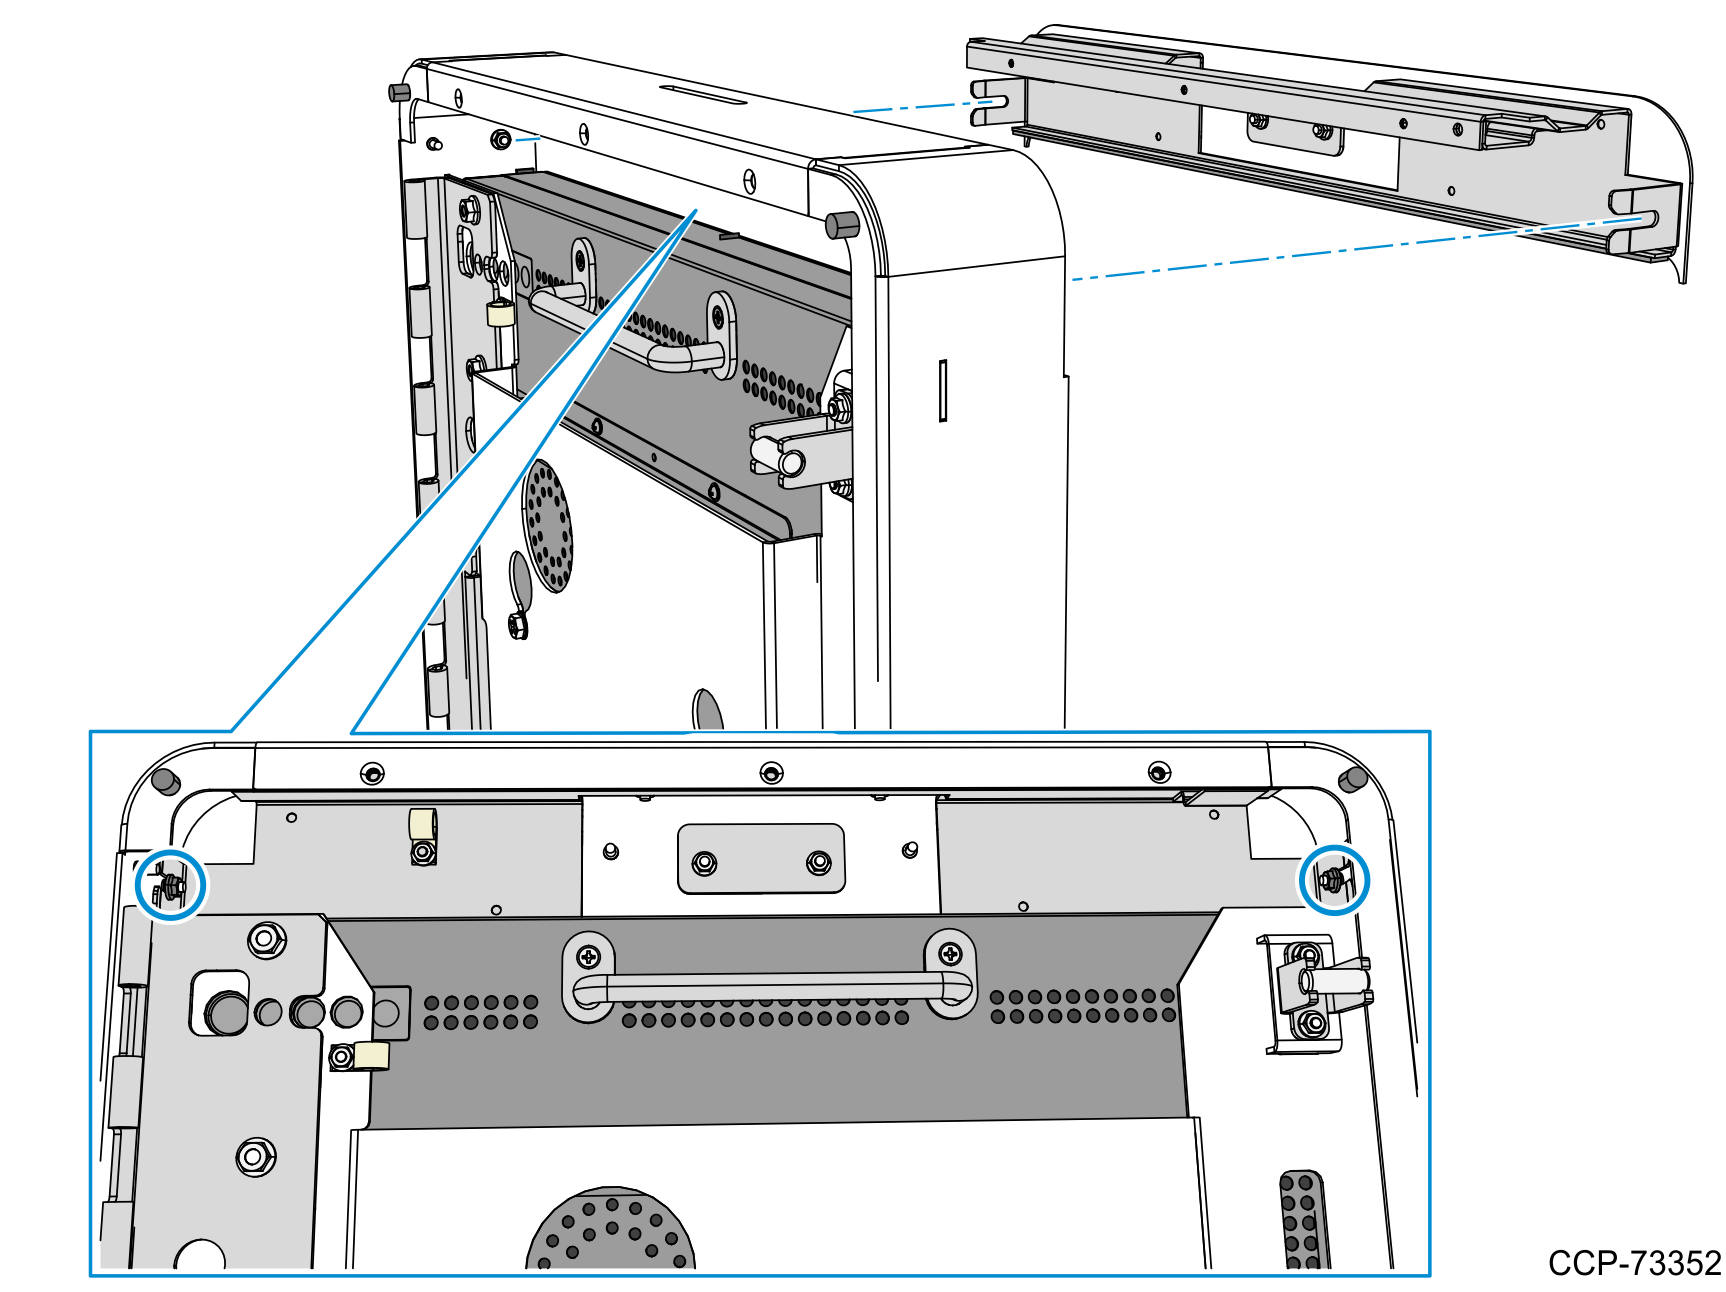
5.Loosen the two M4 nuts securing the Top Panel.
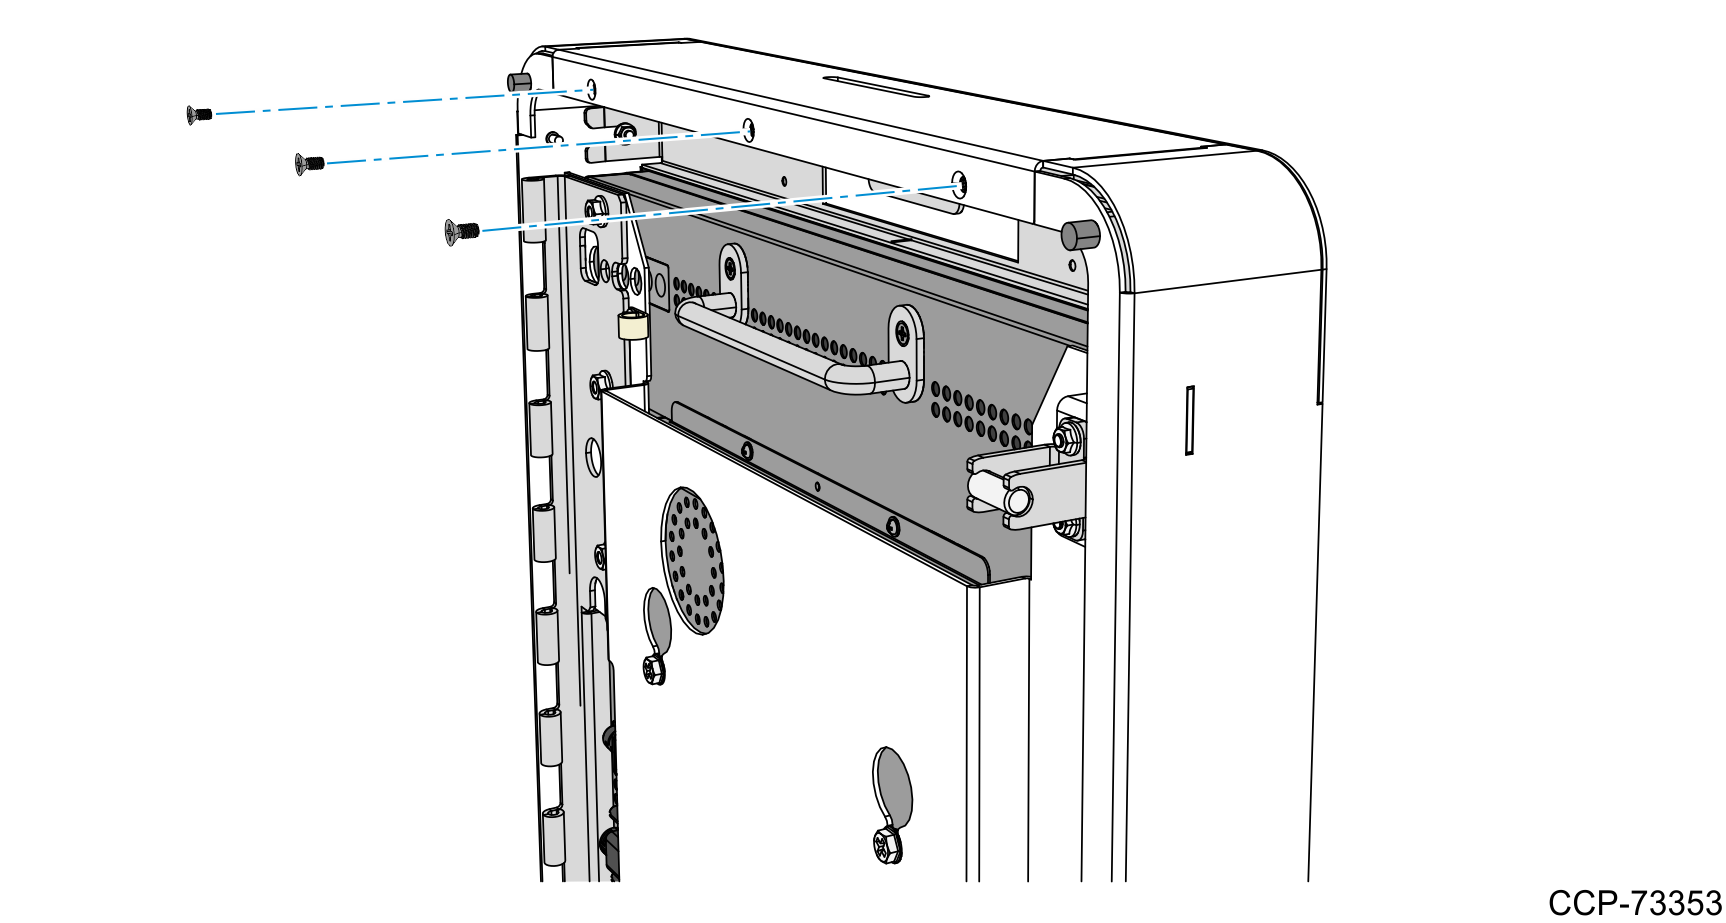
6.Remove the Top Panel by removing three M4 flat head screws.

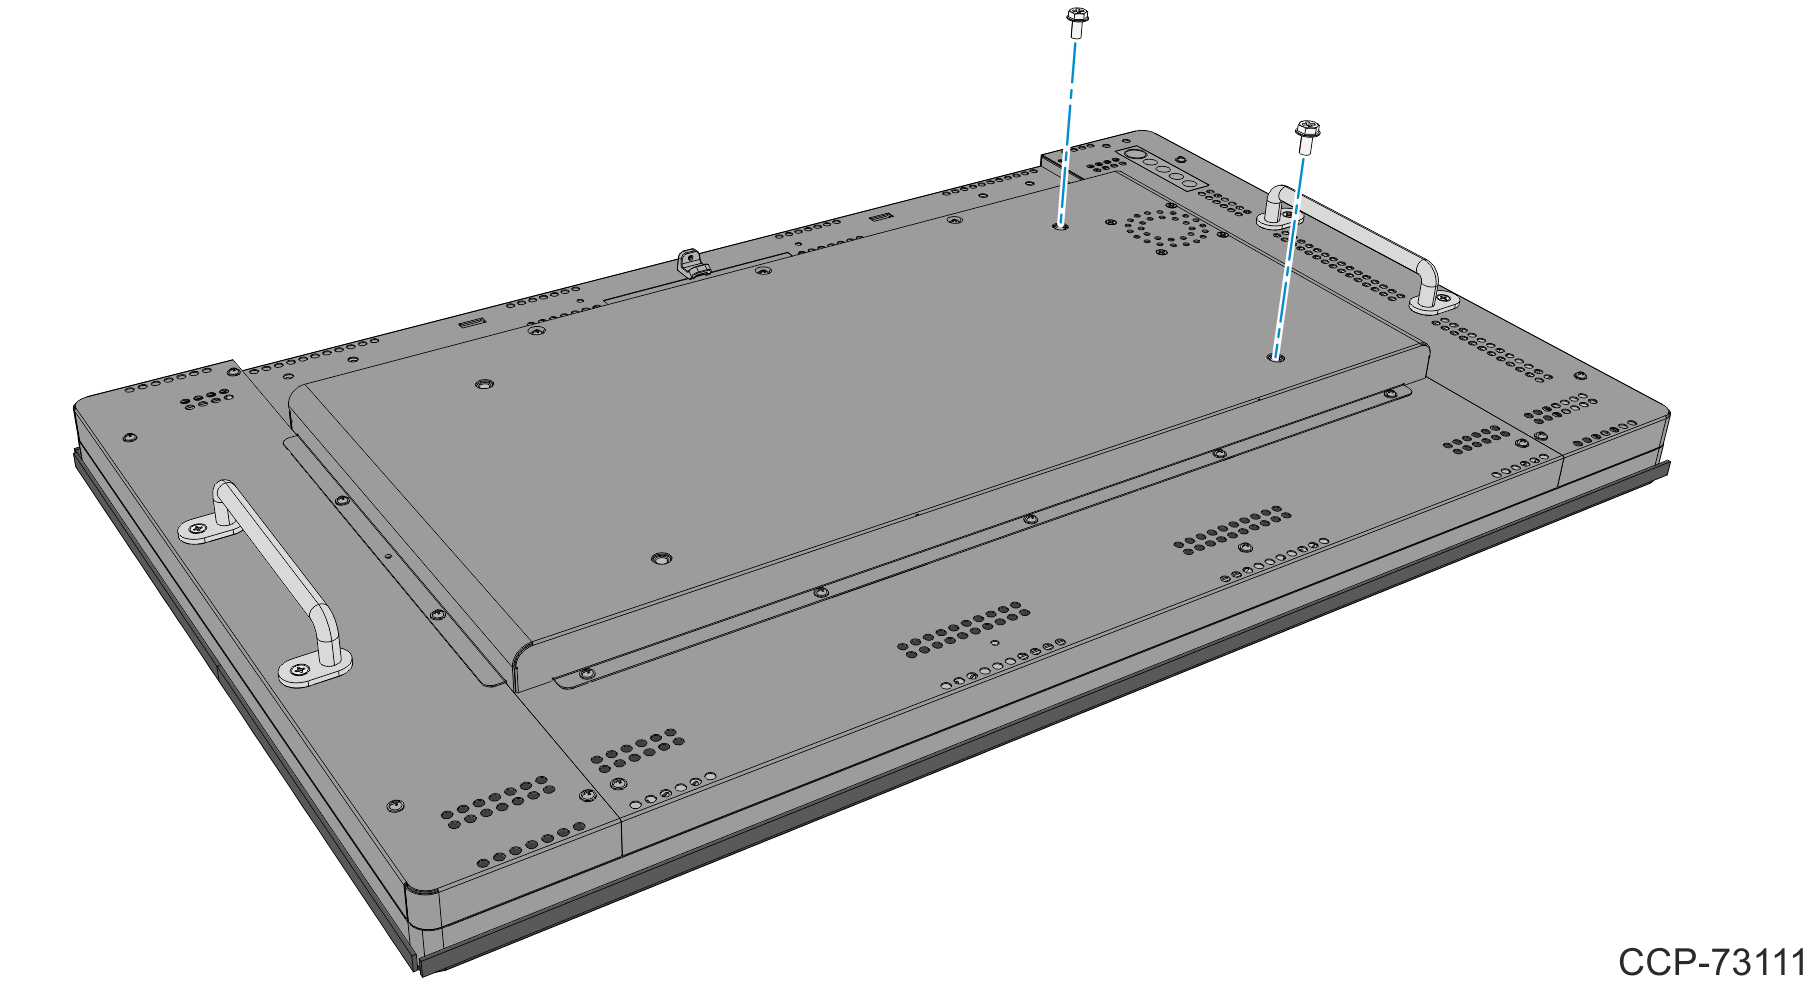
7.Partially tighten two M6 screws on the two mounting holes near the round air vent of the Display.
8.While supporting the Display on the front and rear side, mount the Display on the kiosk.
a.At an angle, insert the bottom part of the display into the Kiosk Door Frame.
b.Rotate the top part of the Display into the kiosk, inserting the partially mounted screws through the keyhole slots on the door panel and then slowly slide the Display down until it rests on the kiosk.
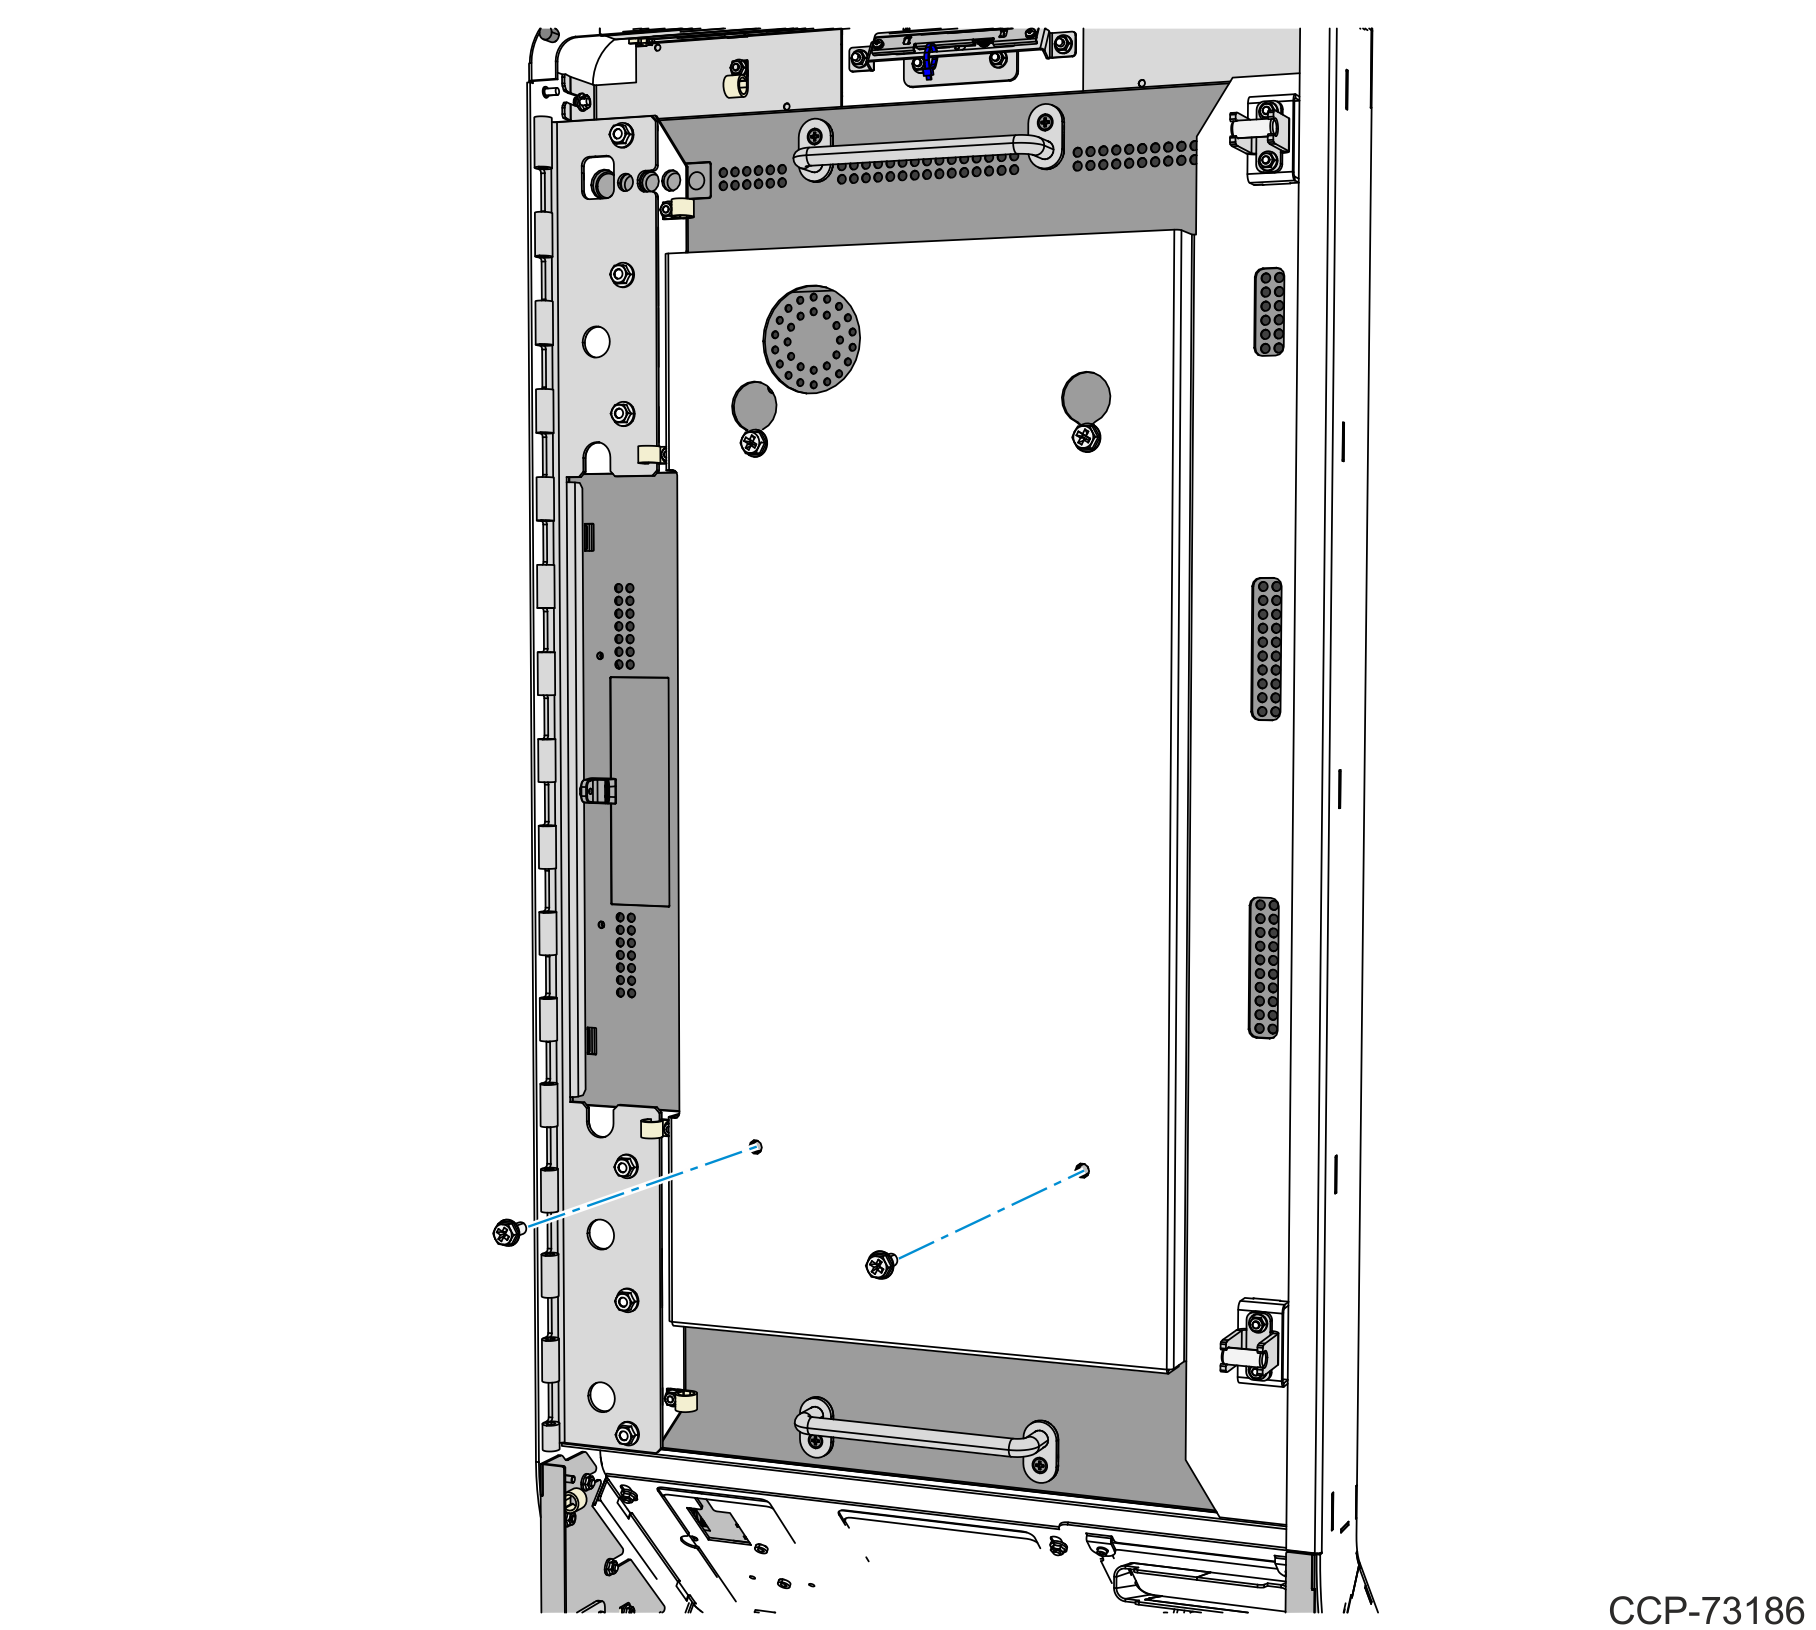
9.Partially install two M6 screws on the bottom mounting holes of the display. Use the handles to make alignment adjustments and then tighten all four M6 screws to secure the display.
10.Mount the Top Panel to the kiosk by hooking the bracket on studs with partially installed nuts, and then tighten the nuts.
11.Secure the Top Panel using three M4 flat head screws.
12.Mount and secure Indicator Light assembly using the two M4 nuts.
13.Install the Camera assembly to the kiosk.
a.Insert the black plastic Indicator Light Cover under the Indicator Light, mounting its slots over the two studs on the Top Panel.
b.Mount and secure the Camera assembly using two M4 nuts.
14.Secure the Indicator Light and Camera cables to the cable clamp on the Top Panel.